How Often to Stop on a Road Trip With a Baby
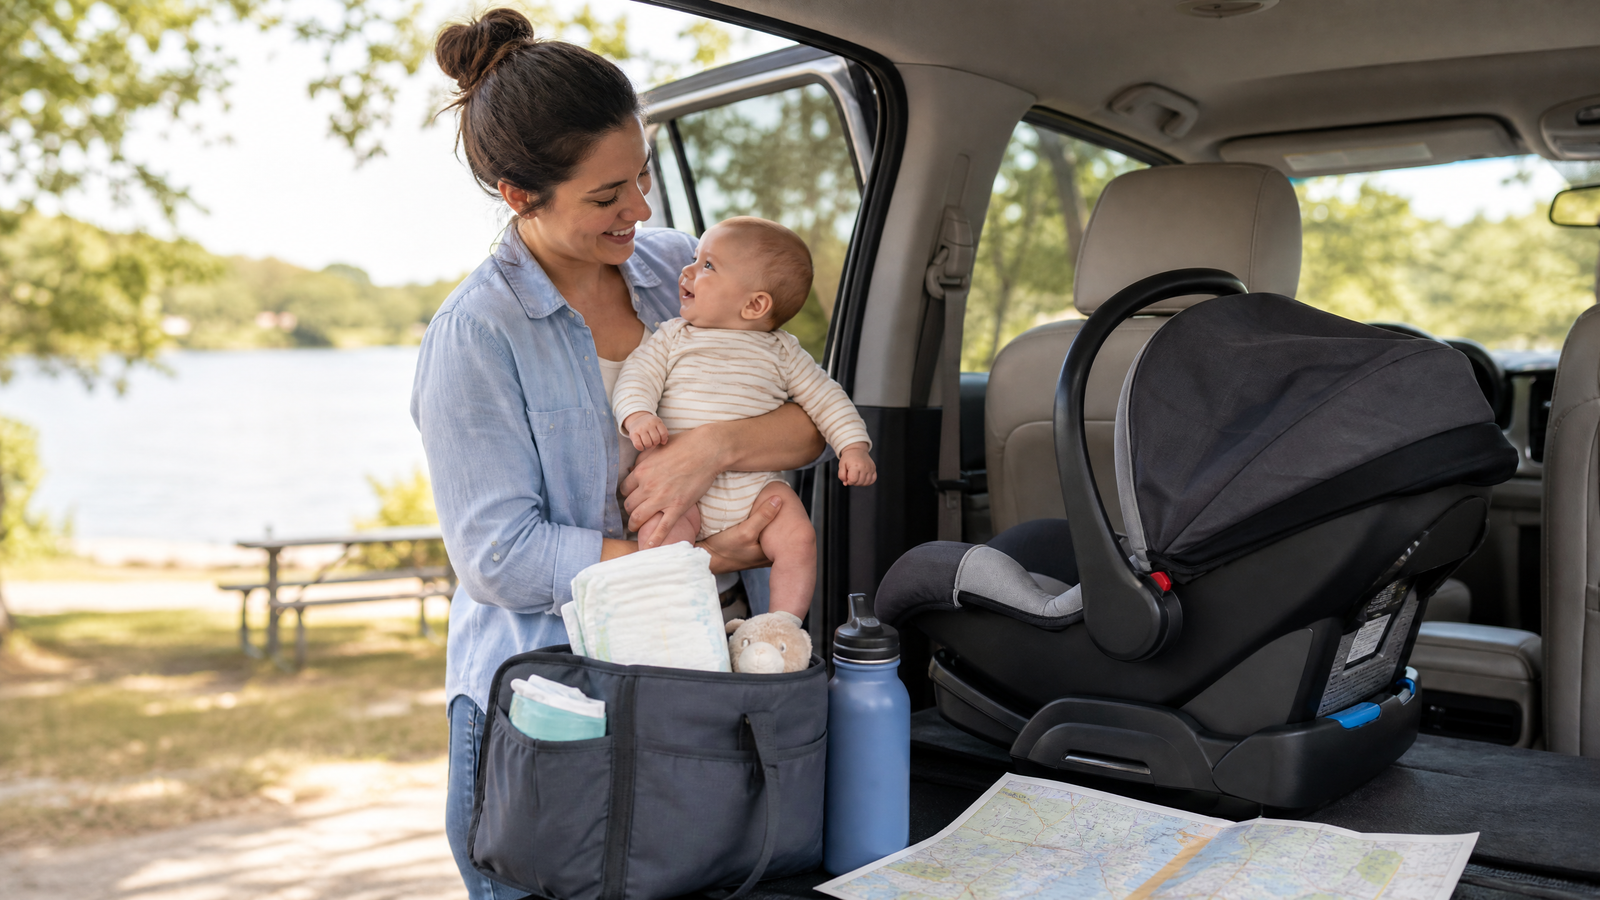
For a daytime road trip, plan a full stop about every 2 to 3 hours. For an overnight drive, the American Academy of Pediatrics guidance suggests planning a break every 4 to 6 hours. Stop sooner whenever your baby needs a feed, diaper change, position check, comfort break, or medical attention.[1]
These intervals are planning starting points, not a universal legal limit. They are also not permission to keep driving when your baby is uncomfortable, slumped, overheated, vomiting, or difficult to rouse. While the vehicle is moving, keep your baby correctly buckled in the car seat. Once you arrive, move a sleeping baby to a safe sleep product rather than leaving them in the car seat outside the vehicle.[1] [4]
A successful stop is more than a quick fuel purchase. Park in a safe, legal location first. Then unbuckle the baby only after the vehicle has stopped. Use the break to feed, change, check the harness and breathing position, and give your baby supervised time out of the seat. Finally, let the driver rest whenever needed. Arriving later is safer than rushing through a tired or difficult drive.
Quick answer: a practical baby road-trip break schedule
Use the table below as a flexible planning tool. Your baby’s cues and your clinician’s advice come before the clock.
| Situation | Planning starting point | Stop sooner when |
|---|---|---|
| Daytime road trip | Plan a full stop every 2–3 hours. | Your baby is hungry, wet, hot, slumped, vomiting, distressed, or unusually difficult to rouse. |
| Overnight road trip | Plan a break every 4–6 hours. | The baby needs care, the driver feels sleepy, the seat needs checking, or road conditions change. |
| Feeding or pumping routine | Build planned stops around the usual routine. | The baby shows hunger cues or milk cannot be handled safely while the car is moving. |
| Diaper-sensitive baby | Keep the route flexible before the planned interval. | The diaper is soiled, clothing is wet, or the skin needs attention. |
| Any trip | Follow the car-seat manual and your pediatrician’s advice. | Your baby has breathing difficulty, a color change, injury, repeated vomiting, or concerning illness. |
Important: There is no benefit in waiting for the clock if your baby needs a stop now. Pull over in a safe location before anyone unbuckles or feeds the baby.
Before you leave: prepare the car seat and route
A calmer road trip begins before the engine starts. First, read the car-seat manual and the vehicle owner’s manual. The correct installation angle, harness routing, and permitted accessories depend on the specific seat and vehicle. A generic internet checklist cannot replace those instructions.
Check the installation and recline angle
The AAP advises using a rear-facing car seat at the correct angle. The angle helps prevent a baby’s head from slumping forward into a chin-to-chest position that can interfere with the airway. The five-point harness should be adjusted correctly and pulled snugly while the baby rides.[1]
NHTSA recommends keeping children rear-facing as long as possible, up to the top height or weight limit allowed by the particular car seat. Therefore, do not turn a child forward-facing because a trip is long or because the child is unhappy in the seat.[2] Follow the seat manufacturer’s limits instead.
If you are uncertain about the installation, look for a Certified Child Passenger Safety Technician or an inspection station. NHTSA provides car-seat installation and inspection resources.[2] A professional check can be especially helpful before a long trip, after changing vehicles, or after reinstalling the seat.
Map actual care stops
Mark rest areas, fuel stations, food stops, and possible overnight locations before departure. A fuel stop may not have a changing table. A remote rest area may not have the supplies you expect. Availability can change, so keep a flexible backup plan.
Choose stopping points that give the family enough time to park, remove the baby, attend to care needs, and reset. A rushed stop can leave the harness twisted, a diaper unfinished, or a tired driver back on the road too soon.
For a broader packing list, see ChildBloom’s newborn diaper-bag essentials guide. Keep this road-trip article focused on break timing rather than repeating every diaper-bag product or packing recommendation.
Keep a small care bag within adult reach
Place a compact back-seat care bag where an adult can reach it after the vehicle is parked. Useful items may include diapers, wipes, a changing surface, spare clothing, burp cloths, feeding supplies, a sealable waste bag, and hand sanitizer. Bring any clinician-approved items your family already uses, but do not add a new medicine to the trip plan without asking the child’s clinician.
Pack a separate cooler or feeding container when your usual feeding plan requires one. Follow current storage and preparation instructions for the milk or formula you use. Avoid making a bottle or feeding an unrestrained baby while the vehicle is moving. Stop first.
How often should you stop on a road trip with a baby?
The AAP’s suggested interval is a practical starting point: every 2–3 hours during a day trip and every 4–6 hours at night.[1] However, the actual schedule depends on the baby’s age, feeding pattern, health, car-seat fit, weather, road conditions, and the driver’s alertness.
The clock should organize the route, not control the baby. If your child needs a stop at 90 minutes, stop at 90 minutes. If the route is moving well at two hours, keep the next safe stop in view rather than trying to stretch the trip indefinitely.
Daytime road trips
For a daytime drive, plan a full care stop every 2–3 hours. Many families will need more frequent stops, especially with a young infant or a baby who feeds often. The planned interval is not a countdown that requires you to keep the baby in the seat until the last minute.
Stop earlier for hunger cues, a wet or soiled diaper, visible slumping, heat, persistent distress, vomiting, or any concern about breathing or color. Also stop if the adult in the back seat cannot confidently assess the baby. The driver should never try to fix the harness, hand over a bottle, or turn around while driving.
Overnight road trips
The AAP source gives a 4–6-hour overnight planning interval. Even so, the longer interval does not remove the need to monitor the baby or the driver.[1] A sleeping baby still needs an adult to notice care needs. A sleeping driver needs a stop immediately.
Before leaving, decide which adult will monitor the baby and which safe locations may work for longer breaks. If the driver becomes sleepy, do not use the baby’s sleep as a reason to continue. Switch drivers when possible, take a proper rest break, or stop the trip for the night.
Newborns, premature babies, and babies with medical needs
There is no single “safe number of hours” that applies to every infant. Parents of premature babies, babies with breathing problems, babies recovering from an illness, or children with special medical needs should ask the pediatrician about the specific trip.
A clinician may suggest a different schedule or additional preparation based on the child’s history. Share the route, expected drive time, feeding pattern, and planned overnight stops. If the baby is currently ill, ask whether the trip should be postponed.
Let the baby’s routine guide the route
Use the baby’s normal feeding and diaper pattern to add flexibility. You do not need perfect timing. Instead, try to stop before the baby becomes overtired, very hungry, or hard to settle.
If the baby usually feeds every two hours, the family may need more frequent stops than the broad AAP starting interval. Likewise, a baby who needs frequent diaper changes may require a different route plan. The goal is a manageable trip, not a record arrival time.
What should you do during a baby road-trip break?
Think of each stop as a care reset. The sequence below helps keep the break organized.
1. Park safely before unbuckling
Pull into a safe, legal stopping location. Turn off the vehicle and make sure the car is stable. Only then unbuckle the baby. Never remove the harness while the vehicle is moving, even if the baby is crying.
If no planned stop is immediately available and the baby needs urgent attention, use the safest available legal option. In a true emergency, call emergency services. Do not place the baby on a roadside shoulder for a routine feed or diaper change.
2. Remove the baby from the car seat
Once parked, move the baby to a safe, supervised location. The purpose of the break is to provide a change from the seated travel position and to address feeding, diapering, and comfort needs.
Do not place the baby on an unsecured car roof, an adult bed, a couch edge, or another surface where the child could fall. If you are at a rest area, use a stable changing surface and keep one adult close.
3. Check breathing, color, temperature, and comfort
Look at the baby’s face and body. Check that the airway appears clear, breathing looks comfortable, and skin color is not blue or gray. Notice whether clothing, blankets, or the harness seem to be causing discomfort. If the baby appears limp, cannot be roused normally, or has trouble breathing, treat the situation as urgent.
A stop is also a good time to check whether the harness is flat and snug when you re-buckle the baby. If the seat angle or installation has changed, do not resume the trip until the issue is corrected according to the manuals.
4. Feed only after stopping
Breastfeed, bottle-feed, or prepare a bottle only after the car is parked. The AAP specifically says never to breastfeed in a moving car.[1] The same stop-first principle protects the baby from riding unrestrained or from a caregiver becoming distracted while driving.
Give yourself enough time to feed calmly. If the baby vomits, has repeated trouble feeding, or seems unusually sleepy, stop the trip and contact the pediatrician for guidance.
5. Change the diaper and clothing
Change a wet or soiled diaper during the stop. Replace damp clothing and check the skin for irritation or pressure points. Keep supplies organized so that the adult changing the baby does not need to leave the child unattended on a changing surface.
Use the car-seat manual for clothing and harness guidance. In particular, do not add items under the harness unless the manufacturer permits them. When the baby returns to the seat, verify that the straps are flat and snug.
6. Give the baby supervised movement
Hold the baby, or allow age-appropriate movement on a safe surface under direct supervision. A brief stretch can make the next part of the trip more comfortable. Do not prescribe a fixed amount of movement for every child. The appropriate activity depends on age, development, health, and the stop environment.
Car-seat safety during the drive
A break schedule works only when the restraint is used correctly between stops. The car seat should match the child’s current size and the vehicle. It should also be installed and used according to the manuals.
Related reading: Toddler Motion Sickness on a Road Trip.
Use the seat exactly as directed
Follow the car-seat manufacturer’s instructions for installation angle, harness position, padding, inserts, and accessories. NHTSA also advises reading the vehicle owner’s manual and using the correct installation method for that vehicle.[2]
Do not add an aftermarket head support, mirror, toy, cushion, or insert simply because it appears helpful. Ask the manufacturer whether an item is approved for that seat. The safest general rule is to use only what the car-seat instructions permit.
Watch for slumping without distracting the driver
When possible, have another responsible adult ride in the back seat. The AAP notes that an adult or responsible older child nearby can notice care needs and help identify when to stop.[1] That person should monitor the baby without unbuckling or repositioning the child while the car is moving.
If no adult can sit in back, use safe supervision methods that do not distract the driver. Never use a phone while driving. Never reach into the back seat, turn around, or attempt to solve a harness problem from the driver’s seat.
Keep the child rear-facing within the seat’s limits
NHTSA recommends keeping children rear-facing as long as possible, up to the top height or weight limit allowed by the particular seat.[2] That recommendation does not change because the drive is long. Check the label and manual for the seat’s limits.
If the child outgrows the rear-facing limits, follow the manufacturer’s instructions and NHTSA’s age-and-size guidance for the next restraint stage. Do not make a transition based only on a child’s mood during a road trip.
Register the seat and check recalls
NHTSA recommends registering the car seat with its manufacturer so the family can receive recall and safety updates.[2] Complete that step before a long journey if it has not already been done. Keep the model and manufacture details accessible in case you need to check a notice.
Feeding, diapering, and comfort at stops
A simple stop plan can reduce stress. Bring the supplies your baby normally uses, but avoid turning the back seat into an unsafe storage area. Keep loose items secured and place care supplies where an adult can reach them after parking.
Breast milk and formula
Follow the current storage and preparation guidance that applies to your feeding method. If you use a cooler, pack it according to the product and food-safety directions. Do not rely on a warm car as a safe storage environment. When the family also flies, ChildBloom’s breast-milk TSA guide covers airport screening and transport questions; it is not a substitute for road-trip planning.
At a road stop, prepare and offer the feed after the car is parked. If the baby refuses several feeds, vomits repeatedly, or seems unusually sleepy, contact the pediatrician rather than simply extending the drive.
Use the baby’s cues
Crying can mean many things. Look for hunger cues, a wet diaper, overheating, discomfort, fatigue, or the need for a change of position. Do not diagnose the cause from an article. Stop, check the basics, and seek advice when the pattern is unusual or persistent.
The best plan also includes the adults. Pack water and food for the driver. If the driver needs coffee, a meal, or a rest, make that part of the stop. Never leave the baby alone in the vehicle, even for a short errand.[1]
Where should the baby sleep after a road-trip stop?
A car seat is designed for travel in the vehicle. It is not a routine sleep space outside the car. If a baby falls asleep during the drive, a properly installed car seat can protect the baby while the vehicle is moving. After arrival, move the baby to a product intended for sleep.[1] [4]
Prepare the sleep space before the trip when possible. A crib, bassinet, or play yard intended for infant sleep should have a firm, flat surface and a fitted sheet. CPSC advises placing babies on their backs in a bare sleep space and moving them to an appropriate sleep product if they fall asleep elsewhere.[4]
At a hotel or family member’s home, inspect the available sleep space before settling the baby. If there is no suitable option, use a safe travel sleep product that meets the applicable requirements. ChildBloom’s lightweight travel crib guide can help with product-selection questions; this article’s focus is the transition from the car to safe sleep.
Do not add a pillow, loose blanket, cushion, or padded topper to make the sleep space feel more comfortable. Also, do not leave the baby sleeping in the car seat while adults unpack, eat, or sleep.
Does traveling at night change the break schedule?
Nighttime travel may allow a longer planning interval. The AAP source suggests breaks every 4–6 hours at night.[1] However, the driver’s alertness remains a separate safety priority.
Before leaving, identify safe stopping locations and decide who will monitor the baby. If visibility, weather, traffic, or fatigue makes driving unsafe, stop. Do not continue because the baby is quiet or because the next rest area is still ahead.
See also: Best Baby Car Seats 2024.
A sleeping baby does not remove the need for adult supervision. If the child needs a diaper, feed, temperature adjustment, or position check, pull over before providing care. Similarly, if the driver feels sleepy, stop driving and rest or change drivers when possible.
When should you stop early or call your pediatrician?
Stop as soon as it is safe when:
- The baby is visibly slumped or the airway position looks concerning.
- The baby is hungry, wet, overheated, vomiting, or persistently distressed.
- Clothing or the harness needs attention.
- The caregiver cannot confidently assess the baby.
- The driver needs a rest, food, or a change of driver.
- Road, weather, traffic, or vehicle conditions make continuing unsafe.
Pull over before unbuckling the child. If the car cannot be stopped safely and there is an immediate emergency, call emergency services.
Seek urgent help when:
Your baby has trouble breathing, turns blue or gray, becomes unresponsive, has seizure-like activity, suffers a serious injury, or is involved in a crash. Call local emergency services for an emergency. Do not try to diagnose the cause from this article.
After a crash, follow instructions from emergency responders, the car-seat manufacturer, and current child-passenger-safety guidance before reusing the seat. Do not assume that a seat is safe simply because the damage is not visible.
Call the pediatrician before or during the trip when:
Ask for individualized advice if your baby was born prematurely, has breathing problems, has a chronic medical condition, is recovering from an illness, has repeated vomiting, has fever or other concerning symptoms, or may not be ready for a long drive. Share the route, timing, feeding plan, and expected stops.
This article provides general travel information. It does not replace the pediatrician’s advice, the car-seat manual, the vehicle manual, or emergency services.
Frequently asked questions about baby road-trip breaks
How often should you stop on a road trip with a baby?
Plan a full stop about every 2–3 hours for a daytime trip and every 4–6 hours at night, using the AAP guidance as a starting point.[1] Stop sooner whenever the baby needs care or the driver needs rest. The schedule is flexible, not a universal law.
Is there a strict two-hour car-seat rule for road trips?
Parents often use “two-hour rule” as shorthand. However, this article does not present it as a universal law. Use the AAP break guidance, the car-seat manual, the vehicle manual, the child’s cues, and the pediatrician’s advice as the decision framework.[1]
Can I feed my baby while the car is moving?
No. Pull over safely before feeding, changing, or removing the harness. The AAP specifically advises never attempting to breastfeed in a moving car.[1] Keeping the baby restrained while the vehicle moves is part of the travel plan.
Can my baby sleep in the car seat during a road trip?
A properly installed car seat can protect a baby while traveling in the vehicle. Nevertheless, it is not a routine sleep space outside the car. After arrival, move the baby to a crib, bassinet, play yard, or other product intended for infant sleep.[1] [4]
What if my baby needs a stop before we reach a rest area?
Use the safest available legal stopping option and prioritize the baby’s needs. Never continue driving simply to preserve the planned schedule. Do not recommend routine care on a roadside shoulder. In an emergency, call emergency services.
Should I bring a travel crib on a road trip?
Bring or arrange a safe sleep product if the destination may not provide one. The AAP recommends bringing a bassinet or portable play yard when a safe sleep space is not available.[1] Choose a product intended for sleep and follow its instructions. Do not improvise with a couch, adult bed, or car seat.
What should I do if my baby cries for most of the drive?
Stop and check basic needs such as feeding, diapering, temperature, harness fit, and comfort. If the crying is unusual, persistent, or accompanied by vomiting, breathing difficulty, color change, or unusual sleepiness, contact the pediatrician or seek urgent help as appropriate.
Bottom line
Plan a full stop every 2–3 hours for a daytime road trip and every 4–6 hours overnight, but treat those intervals as flexible starting points. Stop sooner for feeding, diapering, slumping, discomfort, illness, or driver fatigue. A safe trip is more important than arriving on schedule.
Author and medical-review note
Written by: ChildBloom Editorial Team
Medically reviewed by: Dr. Ahmad Raza, MD (Pediatrics)
Medical review date: August 26, 2026
This article provides general pediatric travel and car-seat information. It does not replace advice from your child’s pediatrician, the instructions for your specific car seat and vehicle, or emergency services. Recommendations and manufacturer instructions can change.
- HealthyChildren.org / AAP: Is it safe for my baby to travel in a car seat for hours at a time?
- NHTSA: Keep Kids Safe on the Road
- NHTSA: Car Seats and Booster Seats
- CPSC: Safe Sleep – Cribs and Infant Products
Related ChildBloom Guides
- Lightest FAA Approved Car Seat Under 15 lbs
- Best Infant Car Seat for Airplane Travel (FAA 2026)
- Minimal Baby Travel Gear Checklist for Flying
- Baby Sleep in a Hotel Room
- Best Newborn Strollers with Bassinets for Safe Use
- Browse all Travel guides
References & Medical Sources
- AAP: long car rides in a car seat
- NHTSA child passenger safety
- AAP family travel safety tips
- CDC motion sickness
Reviewed by the ChildBloom pediatric panel. Meet our physicians on the About page. This article is educational and does not replace your child’s clinician.




4 Comments